Showing posts with label Dessert. Show all posts

Wednesday, September 8, 2010

Sept. Recipe Exchange Favorites: Breads

We have a church recipe exchange once a month. This month's theme was bread. I'm posting my favorites so I can have them easily accessible.

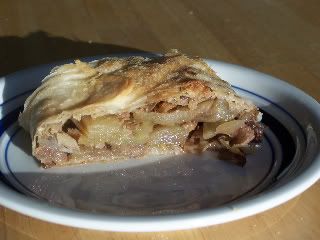
Artisan Bread Loaf (I loved this one. Probably my fav. Great crumb)
By:  Ruth Judd
Recipe:
3 cups (430g) flour 1½ cups (345g or 12oz) water ¼ teaspoon (1g) yeast 1¼ teaspoon (8g) salt olive oil (for coating) extra flour, wheat bran, or cornmeal (for dusting)
Two medium mixing bowls 6 to 8 quart pot with lid (Pyrex glass, Le Creuset cast iron, or ceramic) Wooden Spoon or spatula (optional) Plastic wrap Two or three cotton dish towels (not terrycloth) 

Process: Mix all of the dry ingredients in a medium bowl. Add water and incorporate by hand or with a wooden spoon or spatula for 30 seconds to 1 minute. Lightly coat the inside of a second medium bowl with olive oil and place the dough in the bowl. Cover the bowl with plastic wrap and let the dough rest 12 hours at room temperature (approx. 65-72°F).
Remove the dough from the bowl and fold once or twice. Let the dough rest 15 minutes in the bowl or on the work surface. Next, shape the dough into ball. Generously coat a cotton towel with flour, wheat bran, or cornmeal; place the dough seam side down on the towel and dust with flour. Cover the dough with a cotton towel and let rise 1-2 hours at room temperature, until more than doubled in size. Preheat oven to 450-500°F. Place the pot in the oven at least 30 minutes prior to baking to preheat. Once the dough has more than doubled in volume, remove the pot from the oven and place the dough in the pot seam side up. Cover with the lid and bake 30 minutes Then remove the lid and bake 15-30 minutes uncovered, until the loaf is nicely browned. 

*I used the baking directions from a similar recipe and put the loaf on a baking stone that had been preheated in a 450 degree oven. Right before I placed the loaf on the stone I sprinkled some cornmeal on the stone. I baked the loaf for 20 minutes, and had a pan with a cup of hot water under the stone to steam the loaf while it baked. Try the other method as well though. Each will make a great loaf.

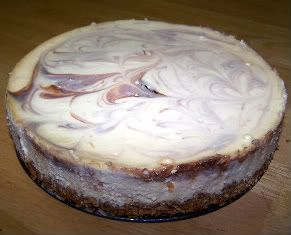
Lemon Blueberry Cheesecake Bread (Not overly sweet, which I liked)
By:  Melissa Smith
For the bread:
1 1/2 cups flour
1 tsp. baking powder
1/4 tsp. salt
6 Tbsp. unsalted butter, at room temperature
3/4 cup sugar
2 large eggs
1/2 tsp. vanilla extract
1 Tbsp. grated lemon zest (about 1 lemon)
1/2 milk (or buttermilk)
1 cup fresh blueberries

For the filling:
8 oz. cream cheese, at room temperature
1/2 tsp. almond extract
1/4 cup sugar
1 tsp. lemon juice
1 egg

For the glaze:
1/4 cup granulated white sugar
2 Tbsp. freshly squeezed lemon juice (about 1 lemon)

Preheat oven to 350 degrees F.

In a small mixing bowl, sift together flour, baking powder and salt and set aside. In a mixing bowl, fitted with a paddle or whisk attachment, cream together butter and sugar until light and fluffy (about 1-2 minutes). Add eggs, one at a time, and mix until incorporated. Add vanilla and lemon zest and mix together. Alternately add the dry ingredients with the milk, starting and ending with the dry ingredients. Mix well. Fold in the blueberries.

In a medium-sized mixing bowl, add all the ingredients for the filling and whisk together.

Prepare a loaf pan by coating with cooking spray. Spoon about half of the batter into the pan, then spread the filling over the top. Spoon the remaining batter on top of the filling; you may want to drop by spoonfulls to get an even distribution as it will be hard to spread over the filling.

Bake bread for about 55-65 minutes, checking for doneness after 55 minutes. While bread is cooking, prepare lemon glaze. In a small saucepan, bring to a boil lemon juice and sugar. Stir until completely dissolved. Remove from heat. When bread is done, remove to a cooling rack and spoon on warm glaze. Let cool 10-15 minutes in the pan then remove the loaf to a cooling rack to cool completely. Resist the urge to cut into the loaf while it is hot, it needs time to set up.

Overnight Rolls (Crescent Rolls I'll probably use for Thanksgiving this year)
By:  Marci Preece
1 ½ c. warm water, divided                                    ½ c. shortening
1 TBS. yeast, (1 package)                                2 eggs
Pinch of salt                                                     1 tsp. salt
1 cup canned evaporated milk                  1 tsp. baking powder
6 cup flour                                                       ½ tsp. baking soda
½ cup instant mashed potato flakes               ½ TBS. sugar
1/3 cup sugar

In a small bowl add ½ cup of warm water, yeast, and ½ TBS. sugar.  Set aside to dissolve.  In a large bowl (or your electric mixing bowl) mix warm milk, 1 cup warm water, 2 cups flour, instant potato flakes, sugar, shortening, eggs, salt, baking powder and baking soda.  Add yeast mixture and remaining 4 cups of flour.  Knead well.  Crisco a large bowl and place dough in it.  Cover with plastic wrap or a towel and place in the fridge overnight.  Remove from fridge and flour the counter top very well.  Flour dough, and roll out.  There are many ways you can shape these.  Use a pizza cutter to cut strips and tie into knots.  You can also separate dough into 2 balls and roll out like a pizza.  Cut into slices and roll from wide end to the tip for crescent shapes.  Place on cookie sheets and let rise three hours.  Preheat oven to 400.  Brush with butter and bake for 10-12 minutes (or brush with melted butter after they are cooked).

Saturday, April 24, 2010

Rocky Road Ice cream

I just made rocky road ice cream tonight and it turned out really well. Like, Matt said he would have thought he was eating premium store bought ice cream if he hadn't seen me make it. So I figured I'd write it down.

Rocky Road Ice Cream
1 (14 oz) can sweetened condensed milk
3/4-1 C. coco powder (depending on how dark you like your chocolate)
1 C. heavy cream
1 3/4 C. whole milk
1 tsp. vanilla
1/2 C. chopped pecans
1/2 C. mini-marshmallows

Directions
1. In a medium saucepan over low heat, mix sweetened condensed milk and coco powder until smooth and slightly thickened, about 5 min. Remove from heat, let cool slightly and mix in cream, milk, and vanilla. Put in the fridge and let it get cold.
2. Pour into ice cream canister and freeze according to manufacturer's directions. Stir in nuts and marshmallows in the last few minutes.
3. Transfer to an airtight container and freeze for 5-6 hours (it will be too soft to eat right out of the ice cream maker).

Saturday, June 27, 2009

June Daring Baker: Bakewell Tart/Pudding

The June Daring Bakers' challenge was hosted by Jasmine of Confessions of a Cardamom Addict and Annemarie of Ambrosia and Nectar. They chose a Traditional (UK) Bakewell Tart... er... pudding that was inspired by a rich baking history dating back to the 1800's in England.

I'd never heard of this, but was excited to make it since the hosts' pictures looked so tantalizing. I as I was making it, I thought it was going to turn out perfectly. By the picture you can tell that it didn't quite turn out perfectly!

When it finished cooking I thought back to where I went wrong since the top got a little too brown and the frangipane was the wrong consistency (and the middle was not quite done). As I thought about it, I realized I did a few things wrong:
  1. The pie pan I thought was 9" was really larger...9 1/2 or 10 in. Oops.
  2. I totally forgot to put the flour in the frangipane! My 18 mo. old was "helping" me cook, and I just got too distracted. Plus I can always use my "I'm 9 mo. pregnant!" excuse since pregnancy seems to make me very forgetful in the kitchen.
  3. My crust seemed waaaayyy too dry after adding the amount of water in the recipe, so I added an extra Tbsp. I think that made it too wet. It didn't taste bad, I think it's just not quite what it should have been.
  4. I rolled the shortening crust a little too thin since my pan was too big.
Despite my errors, the taste of this was actually quite good. It got pretty brown (though it didn't taste burned), so next time I think I'll check and cover it the last 10 min. if needed. Also, I think doing smaller tartlets (like Audax's) would help with the middle not being done...

I made some low sugar blueberry jam. I just used the Ball no-sugar pectin recipe and added 1 cup of sugar to the whole batch. It worked nicely. I think a tarter jam could have worked well too. Cranberry, apricot, etc. I wouldn't mind trying it again, especially if I were to do mini-tartlets. I think that would be quite nice.


Bakewell Tart...er...Pudding

Makes one 23cm (9” tart)
Prep time: less than 10 minutes (plus time for the individual elements)
Resting time: 15 minutes
Baking time: 30 minutes
Equipment needed: 23cm (9”) tart pan or pie tin (preferably with ridged edges), rolling pin

One quantity sweet shortcrust pastry (recipe follows)
Bench flour
250ml (1cup (8 US fl. oz) jam or curd, warmed for spreadability (My homemade stuff didn't need any warming)
One quantity frangipane (recipe follows)
One handful blanched, flaked almonds

Assembling the tart
Place the chilled dough disc on a lightly floured surface. If it's overly cold, you will need to let it become acclimatised for about 15 minutes before you roll it out. Flour the rolling pin and roll the pastry to 5mm (1/4”) thickness, by rolling in one direction only (start from the centre and roll away from you), and turning the disc a quarter turn after each roll. When the pastry is to the desired size and thickness, transfer it to the tart pan, press in and trim the excess dough. Patch any holes, fissures or tears with trimmed bits. Chill in the freezer for 15 minutes.

Preheat oven to 200C/400F.

Remove shell from freezer, spread as even a layer as you can of jam onto the pastry base. Top with frangipane, spreading to cover the entire surface of the tart. Smooth the top and pop into the oven for 30 minutes. Five minutes before the tart is done, the top will be poofy and brownish. Remove from oven and strew flaked almonds on top and return to the heat for the last five minutes of baking.

The finished tart will have a golden crust and the frangipane will be tanned, poofy and a bit spongy-looking. Remove from the oven and cool on the counter. Serve warm, with crème fraîche, whipped cream or custard sauce if you wish.

When you slice into the tart, the almond paste will be firm, but slightly squidgy and the crust should be crisp but not tough.

Jasmine’s notes:
• If you cannot have nuts, you can try substituting Victoria sponge for the frangipane. It's a pretty popular popular cake, so you shouldn't have any troubles finding one in one of your cookbooks or through a Google search. That said, our dear Natalie at Gluten a Go Go has sourced some recipes and linked to them in the related alt.db thread.
• You can use whichever jam you wish, but if you choose something with a lot of seeds, such as raspberry or blackberry, you should sieve them out.
• The jam quantity can be anywhere from 60ml (1/4 cup) to 250ml (1cup), depending upon how “damp” and strongly flavoured your preserves are. I made it with the lesser quantity of home made strawberry jam, while Annemarie made it with the greater quantity of cherry jam; we both had fabulous results. If in doubt, just split the difference and spread 150ml (2/3cup) on the crust.
Annemarie’s notes:
• The excess shortcrust can be rolled out and cut into cookie-shapes (heck, it’s pretty darned close to a shortbread dough).

Sweet shortcrust pastry

Prep time: 15-20 minutes
Resting time: 30 minutes (minimum)
Equipment needed: bowls, box grater, cling film

225g (8oz) all purpose flour
30g (1oz) sugar
2.5ml (½ tsp) salt
110g (4oz) unsalted butter, cold (frozen is better)
2 (2) egg yolks
2.5ml (½ tsp) almond extract (optional)
15-30ml (1-2 Tbsp) cold water

Sift together flour, sugar and salt. Grate butter into the flour mixture, using the large hole-side of a box grater. Using your finger tips only, and working very quickly, rub the fat into the flour until the mixture resembles bread crumbs. Set aside.

Lightly beat the egg yolks with the almond extract (if using) and quickly mix into the flour mixture. Keep mixing while dribbling in the water, only adding enough to form a cohesive and slightly sticky dough.

Form the dough into a disc, wrap in cling and refrigerate for at least 30 minutes

Jasmine’s notes:
• I make this using vanilla salt and vanilla sugar.
• If you wish, you can substitute the seeds of one vanilla bean, one teaspoon of vanilla paste or one teaspoon of vanilla extract for the almond extract

Frangipane

Prep time: 10-15 minutes
Equipment needed: bowls, hand mixer, rubber spatula

125g (4.5oz) unsalted butter, softened
125g (4.5oz) icing sugar
3 (3) eggs
2.5ml (½ tsp) almond extract
125g (4.5oz) ground almonds
30g (1oz) all purpose flour

Cream butter and sugar together for about a minute or until the mixture is primrose in colour and very fluffy. Scrape down the side of the bowl and add the eggs, one at a time, beating well after each addition. The batter may appear to curdle. In the words of Douglas Adams: Don’t panic. Really. It’ll be fine. After all three are in, pour in the almond extract and mix for about another 30 seconds and scrape down the sides again. With the beaters on, spoon in the ground nuts and the flour. Mix well. The mixture will be soft, keep its slightly curdled look (mostly from the almonds) and retain its pallid yellow colour.

Annemarie’s notes:
• Add another five minutes or more if you're grinding your own almonds or if you're mixing by hand (Heaven help you).

Friday, June 19, 2009

White Chocolate Blondies with Goodies

I got the base of the recipe from Picky Palate's White Chocolate Butterfinger Blondies, but I made a number of modifications since I didn't have butterfingers on hand! I made these for a funeral today and one of the people in charge of the food hounded me until I got her the recipe! I was in such a rush to get them to the church on time, I didn't get a picture. Matt said he really liked them too.

White Chocolate Blondies with Goodies
1/2 C. butter
1 1/2 C. white chocolate chips

1 C. white sugar
1/2 C. brown sugar
2 C. flour (I used 1 C. wheat and 1 C. white with good results)
1 tsp baking powder
1 tsp salt
1/2 C. semi-sweet chocolate chips
3/4 C. coconut
3/4 C. chopped walnuts

4 eggs
4 Tbsp sour cream

Powdered sugar for dusting

Directions
  1. Preheat oven to 350* F
  2. Melt butter in microwave safe bowl. Stir in white chips until melted and smooth. You may have to nuke it a little after you add the chips to help them melt.
  3. In a large bowl add the sugar, brown sugar, flour, baking powder, salt. In a small bowl whisk the eggs and sour cream. Pour into the dry ingredients along with the melted white chip mixture. Mix until just combined. Incorporate the semi-sweet chips, coconut, and walnuts.
  4. Pour into a 9X13 baking dish lined with foil that's been sprayed with cooking spray (for easy clean up. You don't have to do that. Just remember to spray your dish regardless.).
  5. Bake for 30-35 min. or until toothpick comes clean from center. Dust with powdered sugar. Let cool before cutting.

Wednesday, May 27, 2009

May Daring Baker: Apple Strudel from Scratch

The May Daring Bakers’ challenge was hosted by Linda of make life sweeter! and Courtney of Coco Cooks. They chose Apple Strudel from the recipe book Kaffeehaus: Exquisite Desserts from the Classic Cafés of Vienna, Budapest and Prague by Rick Rodgers.

Success! I quite enjoyed this challenge. I made this for our Memorial Day BBQ dessert. We had friends over and everyone had good things to say about it. Nice and flaky crust. I could have probably used a little less filling (though I didn't even use the full 2 lbs. of apples in the recipe) so I could have rolled it a little tighter and had a few more layers of flaky crust.

I served it with vanilla ice cream. I wanted to do some creative filling, but my husband wanted the apple so I used the recipe given with the challenge. It was good (maybe a little boring, but still good). Light and not too rich. The dough was really easy to work with (I let it sit the full 90 min.) and I was only a few inches shy of the 2'X3'. The biggest hole in my dough (which was not big) was from my 18 mo. old son trying to sample it! haha.

I don't even own a table cloth, so I used an old, clean sheet. It was the best I could think of. Worked well enough. I had my husband help me roll it up and transfer it to the baking sheet.

I wish I could capture it better with the photography.

Preparation time
Total: 2 hours 15 minutes – 3 hours 30 minutes

15-20 min to make dough
30-90 min to let dough rest/to prepare the filling
20-30 min to roll out and stretch dough
10 min to fill and roll dough
30 min to bake
30 min to cool

Apple strudel
from “Kaffeehaus – Exquisite Desserts from the Classic Cafés of Vienna, Budapest and Prague” by Rick Rodgers

2 tablespoons (30 ml) golden rum
3 tablespoons (45 ml) raisins
1/4 teaspoon ground cinnamon
1/3 cup plus 1 tablespoon (80 g) sugar
1/2 cup (1 stick / 115 g) unsalted butter, melted, divided
1 1/2 cups (350 ml) fresh bread crumbs
strudel dough (recipe below)
1/2 cup (120 ml, about 60 g) coarsely chopped walnuts
2 pounds (900 g) tart cooking apples, peeled, cored and cut into ¼ inch-thick slices (use apples that hold their shape during baking)

1. Mix the rum and raisins in a bowl. Mix the cinnamon and sugar in another bowl.

2. Heat 3 tablespoons of the butter in a large skillet over medium-high. Add the breadcrumbs and cook whilst stirring until golden and toasted. This will take about 3 minutes. Let it cool completely.

3. Put the rack in the upper third of the oven and preheat the oven to 400°F (200°C). Line a large baking sheet with baking paper (parchment paper). Make the strudel dough as described below. Spread about 3 tablespoons of the remaining melted butter over the dough using your hands (a bristle brush could tear the dough, you could use a special feather pastry brush instead of your hands). Sprinkle the buttered dough with the bread crumbs. Spread the walnuts about 3 inches (8 cm) from the short edge of the dough in a 6-inch-(15cm)-wide strip. Mix the apples with the raisins (including the rum), and the cinnamon sugar. Spread the mixture over the walnuts.

4. Fold the short end of the dough onto the filling. Lift the tablecloth at the short end of the dough so that the strudel rolls onto itself. Transfer the strudel to the prepared baking sheet by lifting it. Curve it into a horseshoe to fit. Tuck the ends under the strudel. Brush the top with the remaining melted butter.

5. Bake the strudel for about 30 minutes or until it is deep golden brown. Cool for at least 30 minutes before slicing. Use a serrated knife and serve either warm or at room temperature. It is best on the day it is baked.

Strudel dough
from “Kaffeehaus – Exquisite Desserts from the Classic Cafés of Vienna, Budapest and Prague” by Rick Rodgers

1 1/3 cups (200 g) unbleached flour
1/8 teaspoon salt
7 tablespoons (105 ml) water, plus more if needed
2 tablespoons (30 ml) vegetable oil, plus additional for coating the dough
1/2 teaspoon cider vinegar

1. Combine the flour and salt in a stand-mixer fitted with the paddle attachment. Mix the water, oil and vinegar in a measuring cup. Add the water/oil mixture to the flour with the mixer on low speed. You will get a soft dough. Make sure it is not too dry, add a little more water if necessary.
Take the dough out of the mixer. Change to the dough hook. Put the dough ball back in the mixer. Let the dough knead on medium until you get a soft dough ball with a somewhat rough surface.

2. Take the dough out of the mixer and continue kneading by hand on an unfloured work surface. Knead for about 2 minutes. Pick up the dough and throw it down hard onto your working surface occasionally.
Shape the dough into a ball and transfer it to a plate. Oil the top of the dough ball lightly. Cover the ball tightly with plastic wrap. Allow to stand for 30-90 minutes (longer is better).

3. It would be best if you have a work area that you can walk around on all sides like a 36 inch (90 cm) round table or a work surface of 23 x 38 inches (60 x 100 cm). Cover your working area with table cloth, dust it with flour and rub it into the fabric. Put your dough ball in the middle and roll it out as much as you can.
Pick the dough up by holding it by an edge. This way the weight of the dough and gravity can help stretching it as it hangs. Using the back of your hands to gently stretch and pull the dough. You can use your forearms to support it.

4. The dough will become too large to hold. Put it on your work surface. Leave the thicker edge of the dough to hang over the edge of the table. Place your hands underneath the dough and stretch and pull the dough thinner using the backs of your hands. Stretch and pull the dough until it's about 2 feet (60 cm) wide and 3 feet (90 cm) long, it will be tissue-thin by this time. Cut away the thick dough around the edges with scissors. The dough is now ready to be filled.

Tips
- Ingredients are cheap so we would recommend making a double batch of the dough, that way you can practice the pulling and stretching of the dough with the first batch and if it doesn't come out like it should you can use the second batch to give it another try;
- The tablecloth can be cotton or polyster;
- Before pulling and stretching the dough, remove your jewelry from hands and wrists, and wear short-sleeves;
- To make it easier to pull the dough, you can use your hip to secure the dough against the edge of the table;
- Few small holes in the dough is not a problem as the dough will be rolled, making (most of) the holes invisible.

Monday, April 27, 2009

April Daring Baker Challenge: Cheesecake


The April 2009 challenge is hosted by Jenny from Jenny Bakes. She has chosen Abbey's Infamous Cheesecake as the challenge.

I love cheesecake and I loved this challenge. After my less than impressive Valentine's Cheesecake this year, I was happy to have a chance to redeem myself. This basic cheesecake recipe was quite divine. A keeper for sure.

I made mine in a spring form pan. To keep the water from seeping in, I first wrapped it in saran wrap about half way up (I promise, it didn't melt). I then used two layers of heavy duty foil. One piece is big enough to cover the whole pan, but I used two just in case of a leak or puncture. It worked beautifully and this was the absolute BEST attempt I've had at making cheesecake. It was silky smooth.

Other tips I've picked up over the years:
  • MAKE SURE YOUR CREAM CHEESE IS AT ROOM TEMP!!!! Honestly, do not skip that step. Otherwise you'll have a lumpy cheesecake that you'll probably over beat to compensate. That will then make your cheesecake puff up and crack. Not a pretty or tasty thing. (This is what I did wrong this year on V-day, so I'm speaking from experience.)
  • I've had better luck using an electric hand beater as opposed to my kitchenaid. I can control the mixing a little better and thus beat it less.
  • Don't overbeat the mixture or it will puff up and crack while baking.

Instead of using the crust recipe provided, I made a peanut butter-pretzel crust and LOVED it. I got the recipe here but reduced the oil by a 2 TBSP. So my crust recipe was as follows:

Peanut-butter pretzel crust
2 cups of pretzel crumbs
1 Tbsp. sugar
1/4 cup extra light olive oil
3 Tbsp. natural (salted) peanut butter

Start with a clean food processor and make the pretzel crumbs by whizzing the pretzels in there for a while. Add the remaining crust ingredients right in there and pulse until it starts to clump together slightly. The little bit of PB with the pretzels tastes like a Butterfinger bar.

Press the crust into the bottom of a spring form pan.


Abbey's Infamous Cheesecake:

crust: (didn't use this recipe, so I can't vouch for this crust)
2 cups / 180 g graham cracker crumbs
1 stick / 4 oz butter, melted
2 tbsp. / 24 g sugar
1 tsp. vanilla extract

cheesecake: (awesome!!! my new basic cheesecake recipe!)
3 sticks of cream cheese, 8 oz each (total of 24 oz) room temperature
1 cup / 210 g sugar
3 large eggs
1 cup / 8 oz heavy cream
1 tbsp. lemon juice
1 tbsp. vanilla extract (or the innards of a vanilla bean)
1 tbsp liqueur, optional, but choose what will work well with your cheesecake (I used no liqueur)

*My variation on this was a nutella marbled cheesecake. I took out 1 cup of batter and mixed it with 3/4 of a small bottle of nutella. I then put a layer of regular cheesecake batter on top of the crust, then the nutella batter mixture, then another regular layer. I used a chopstick to swirll the batter together.

DIRECTIONS:
1. Preheat oven to 350 degrees F (Gas Mark 4 = 180C = Moderate heat). Begin to boil a large pot of water for the water bath.

2. Mix together the crust ingredients and press into your preferred pan. You can press the crust just into the bottom, or up the sides of the pan too - baker's choice. Set crust aside.

3. Combine cream cheese and sugar in the bowl of a stand-mixer (or in a large bowl if using a hand-mixer) and cream together until smooth. Add eggs, one at a time, fully incorporating each before adding the next. Make sure to scrape down the bowl in between each egg. Add heavy cream, vanilla, lemon juice, and alcohol and blend until smooth and creamy.

4. Pour batter into prepared crust and tap the pan on the counter a few times to bring all air bubbles to the surface. Place pan into a larger pan and pour boiling water into the larger pan until halfway up the side of the cheesecake pan. If cheesecake pan is not airtight, cover bottom securely with foil before adding water.

5. Bake 45 to 55 minutes, until it is almost done - this can be hard to judge, but you're looking for the cake to hold together, but still have a lot of jiggle to it in the center. You don't want it to be completely firm at this stage. Close the oven door, turn the heat off, and let rest in the cooling oven for one hour. This lets the cake finish cooking and cool down gently enough so that it won't crack on the top. After one hour, remove cheesecake from oven and lift carefully out of water bath. Let it finish cooling on the counter, and then cover and put in the fridge to chill. Once fully chilled, it is ready to serve.

Pan note: The creator of this recipe used to use a springform pan, but no matter how well she wrapped the thing in tin foil, water would always seep in and make the crust soggy. Now she uses one of those 1-use foil "casserole" shaped pans from the grocery store. They're 8 or 9 inches wide and really deep, and best of all, water-tight. When it comes time to serve, just cut the foil away.

Prep notes: While the actual making of this cheesecake is a minimal time commitment, it does need to bake for almost an hour, cool in the oven for an hour, and chill overnight before it is served. Please plan accordingly!

_______________________________________________

I also made a german chocolate frosting for the top, but it made it way too sweet and really overpowered the cheesecake. It was WAY better without it. But here's a picture anyway.

Sunday, March 1, 2009

February Daring Baker's Challenege:

The February 2009 challenge is hosted by Wendy of WMPE's blog and Dharm of Dad ~ Baker & Chef. We have chosen a Chocolate Valentino cake by Chef Wan; a Vanilla Ice Cream recipe from Dharm and a Vanilla Ice Cream recipe from Wendy as the challenge.

Feb. is just too short and I totally spaced getting this up by yesterday! I actually made it way back at Valentine's Day.

Chocolate Valentino
Preparation Time: 20 minutes

16 ounces (1 pound) (454 grams) of semisweet chocolate, roughly chopped
½ cup (1 stick) plus 2 tablespoons (146 grams total) of unsalted butter
5 large eggs separated

1. Put chocolate and butter in a heatproof bowl and set over a pan of simmering water (the bottom of the bowl should not touch the water) and melt, stirring often.
2. While your chocolate butter mixture is cooling. Butter your pan and line with a parchment circle then butter the parchment.
3. Separate the egg yolks from the egg whites and put into two medium/large bowls.
4. Whip the egg whites in a medium/large grease free bowl until stiff peaks are formed (do not over-whip or the cake will be dry).
5. With the same beater beat the egg yolks together.
6. Add the egg yolks to the cooled chocolate.
7. Fold in 1/3 of the egg whites into the chocolate mixture and follow with remaining 2/3rds. Fold until no white remains without deflating the batter. {link of folding demonstration}
8. Pour batter into prepared pan, the batter should fill the pan 3/4 of the way full, and bake at 375F/190C
9. Bake for 25 minutes until an instant read thermometer reads 140F/60C.
Note – If you do not have an instant read thermometer, the top of the cake will look similar to a brownie and a cake tester will appear wet.
10. Cool cake on a rack for 10 minutes then unmold.
--------------------------------------

I used a mixture or semi-sweet and milk. The consistency of the cake wasn't even, but it all tasted good. I think I didn't fold in my egg whites quite right. But overall I call it a success. We ended up eating the whole thing.


Normally for V. Day I make a cheesecake, so I just incorporated that into the challenge. I made a custard ice cream base using my kitchen aid recipe, I added strawberries I'd mixed with sugar and smashed, and then I chunked up the cheesecake and put it in at the very end. It turned out to be pleasing.

Tuesday, February 3, 2009

Pie crust

Pie Crust:The best (and easiest) homemade recipe I've tried to date

*This recipie makes enough crust for 3 pies. I freeze the leftover flattened into a disk, wrapped in wax paper and use it later.*

5 cups flour

2 cups shortening

1 TBSP white vinegar

1 cup water

1 egg, beaten

1 1/2 tsp. salt (kosher if possible)

Combine flour and shortening with a pastry blender or two knives until it resembles coarse crumbs. Mix together, vinegar, water, and egg then add to flour mixture. Mix until just blended. Roll out between two sheets of waxed paper then place in pie pan. Be sure to poke holes in bottom of crust.

*Note: twice I made this I didn't quite use all of my liquid. Once I used it all. I think it depends on how big the egg is that you use...*

Thursday, January 29, 2009

January Daring Baker: Tuiles

This month's challenge is brought to us by Karen of Bake My Day and Zorra of 1x umruehren bitte aka Kochtopf. They have chosen Tuiles from The Chocolate Book by Angélique Schmeink and Nougatine and Chocolate Tuiles from Michel Roux.
-----------------------------------------------------------------------------------------
It's 10pm on the post day and I'm still in the process of getting mine together. I made the dough last night, but Dean took next to no nap today and I had book club tonight. Yes, I know, I put this off to the end so there's no excuse. I honestly was not happy about this challenge. After the holidays I did not want something sweet. Sure this had a savory option, but it just felt like a lame cracker challenge. I wanted something savory, bready, yeasty, salty, SOMETHING other than sweet/cracker. But whatever. Maybe that's just the pregnant lady in my talking.

Ok. Now that I'm finished and I've eaten them, I have to say this was a decent recipe. It made me think of mini strawberry sponge cake tacos or something. The one completely covered in chocolate was total overkill and made me feel sick. Honestly, my favorite was the plain tuile with strawberries and whipped cream. No chocolate. The chocolate rim wasn't bad, but it overpowered the cookie's taste. Matt liked them too. They were easy, cheap and quick. So I guess they get a good rating. You're supposed to be able to shape these easily right out of the oven, but I found mine were a little too springy to really hold a tight shape. Maybe I made them too thick, but I liked the taste and consitency of them anyway.


Following is a recipe taken from a book called “The Chocolate Book”, written by female Dutch Master chef Angélique Schmeinck.
Recipe:
Yields: 20 small butterflies/6 large (butterflies are just an example)
Preparation time batter 10 minutes, waiting time 30 minutes, baking time: 5-10 minutes per batch

65 grams / ¼ cup / 2.3 ounces softened butter (not melted but soft)
60 grams / ½ cup / 2.1 ounces sifted confectioner’s sugar
1 sachet vanilla sugar (7 grams or substitute with a dash of vanilla extract)
2 large egg whites (slightly whisked with a fork)
65 grams / 1/2 cup / 2.3 ounces sifted all purpose flour
1 table spoon cocoa powder/or food coloring of choice
Butter/spray to grease baking sheet

Oven: 180C / 350F

Using a hand whisk or a stand mixer fitted with the paddle (low speed) and cream butter, sugar and vanilla to a paste. Keep stirring while you gradually add the egg whites. Continue to add the flour in small batches and stir to achieve a homogeneous and smooth batter/paste. Be careful to not overmix.
Cover the bowl with plastic wrap and chill in the fridge for at least 30 minutes to firm up. (This batter will keep in the fridge for up to a week, take it out 30 minutes before you plan to use it).

Line a baking sheet with parchment paper or grease with either butter/spray and chill in the fridge for at least 15 minutes. This will help spread the batter more easily if using a stencil/cardboard template such as the butterfly. Press the stencil on the bakingsheet and use an off sided spatula to spread batter. Leave some room in between your shapes. Mix a small part of the batter with the cocoa and a few drops of warm water until evenly colored. Use this colored batter in a paper piping bag and proceed to pipe decorations on the wings and body of the butterfly.

Bake butterflies in a preheated oven (180C/350F) for about 5-10 minutes or until the edges turn golden brown. Immediately release from bakingsheet and proceed to shape/bend the cookies in the desired shape. These cookies have to be shaped when still warm, you might want to bake a small amount at a time or maybe put them in the oven to warm them up again. (Haven’t tried that). Or: place a bakingsheet toward the front of the warm oven, leaving the door half open. The warmth will keep the cookies malleable.

If you don’t want to do stencil shapes, you might want to transfer the batter into a piping bag fitted with a small plain tip. Pipe the desired shapes and bake. Shape immediately after baking using for instance a rolling pin, a broom handle, cups, cones….

Wednesday, December 31, 2008

A Bûche de Noël: December Daring Baker

This month's challenge is brought to us by the adventurous Hilda from Saffron and Blueberry and Marion from Il en Faut Peu Pour Etre Heureux.
They have chosen a French Yule Log by Flore from Florilege Gourmand


Ok. This recipe was like 16 pages long with all of the possible variations, so I'm not listing the whole recipe. You can view it on the host, Saffron's, post. Even after I condensed it down to the pieces I used, it was 6 pages or something. Crazy long. I almost didn't do it, but Matt really wanted me to. I broke it up into two nights. It probably took about 4 hours total to make and assemble the 6 parts. It wasn't as daunting as it looked, but I'm still not sure if it was worth it. It was good though. AWESOME? Well, it was good. My favorite parts were the mousse and the cinnamon ganache.

My buche de noel consisted of the following:
Dark Chocolate Mousse: very good. I loved it, but it was slightly too dark for Matt.
Ingredients:
2.5 sheets gelatin or 5g / 1 + 1/4 tsp powdered gelatin
1.5 oz (3 Tbsp / 40g) granulated sugar
1 ½ tsp (10g) glucose or thick corn syrup
0.5 oz (15g) water
50g egg yolks (about 3 medium)
6.2 oz (175g) dark chocolate, coarsely chopped
1.5 cups (350g) heavy cream (35% fat content)

1. Soften the gelatin in cold water. (If using powdered gelatin, follow the directions on the package.)
2. Make a Pate a Bombe: Beat the egg yolks until very light in colour (approximately 5 minutes until almost white).
2a. Cook the sugar, glucose syrup and water on medium heat for approximately 3 minutes (if you have a candy thermometer, the mixture should reach 244°F (118°C). If you do not have a candy thermometer, test the sugar temperature by dipping the tip of a knife into the syrup then into a bowl of ice water, if it forms a soft ball in the water then you have reached the correct temperature.
2b. Add the sugar syrup to the beaten yolks carefully by pouring it into the mixture in a thin stream while continuing to beat the yolks. You can do this by hand but it’s easier to do this with an electric mixer.
2c. Continue beating until cool (approximately 5 minutes). The batter should become thick and foamy.
3. In a double boiler or equivalent, heat 2 tablespoons (30g) of cream to boiling. Add the chopped chocolate and stir until melted and smooth.
4. Whip the remainder of the cream until stiff.
5. Pour the melted chocolate over the softened gelatin, mixing well. Let the gelatin and chocolate cool slightly and then stir in ½ cup (100g) of WHIPPED cream to temper. Add the Pate a Bombe.
6. Add in the rest of the WHIPPED cream (220g) mixing gently with a spatula.

Vanilla Creme Brule: not impressed. Bland and icy. Plus, it didn't set up according to the directions in the recipe. I got it to set after turning up the oven for about 3 min. after it was supposed to be done.

Ingredients:
1/2 cup (115g) heavy cream (35% fat content)
½ cup (115g) whole milk
4 medium-sized (72g) egg yolks
0.75 oz (2 Tbsp / 25g) granulated sugar
1 vanilla bean

1. Heat the milk, cream, and scraped vanilla bean to just boiling. Remove from the stove and let the vanilla infuse for about 1 hour.
2. Whisk together the sugar and egg yolks (but do not beat until white).
3. Pour the vanilla-infused milk over the sugar/yolk mixture. Mix well.
4. Wipe with a very wet cloth and then cover your baking mold (whatever shape is going to fit on the inside of your Yule log/cake) with parchment paper. Pour the cream into the mold and bake at 210°F (100°C) for about 1 hour or until firm on the edges and slightly wobbly in the center.

Coconut Crisp Insert: Tasted fine, but it didn't hold together well. I used crushed up rice crispies, but I don't think it was optimal. I did reduce the rice crispies to 1 oz, but it still seemed like too much cereal to white chocolate.
Ingredients:
3.5 oz (100g) white chocolate
1 oz (1/3 cup/25g) shredded coconut
1 2/3 Tbsp (25g) unsalted butter
2.1 oz (60g) lace crepes or rice krispies or corn flakes or Special K

1. Spread the coconut on a baking tray and bake for 5-10 minutes at 375°F (190°C) to toast (a different temperature might work better for you with your own oven).
2. Melt the white chocolate and butter in a double boiler. Stir until smooth and add the toasted coconut.
3. Add the coarsely crushed lace crepes. Mix quickly to thoroughly coat with the chocolate. Spread between two sheets of wax paper to a size slightly larger than your desired shape. Refrigerate until hard.

Cinammon-Milk Ganache Insert: Both Matt and my favorite layer. I did burn the sugar the first time and nearly burned it the second. Watch it closely! It burns very quickly.

Ingredients
1.75 oz (4 Tbsp / 50g) granulated sugar
4.5oz (2/3 cup – 1 Tbsp / 135g) heavy cream
A pinch of cinnamon
2.7 oz (75g) milk chocolate, finely chopped
3.2 oz (90g) dark chocolate, finely chopped
3Tbsp + 1/2tsp (45g) unsalted butter softened

1. Make a caramel: Using the dry method, melt the sugar by spreading it in an even layer in a small saucepan with high sides. Heat over medium-high heat, watching it carefully as the sugar begins to melt. Never stir the mixture. As the sugar starts to melt, swirl the pan occasionally to allow the sugar to melt evenly. Cook to dark amber color (for most of you that means darker than last month’s challenge).
2. Heat the cream with the cinnamon (use the quantity of cinnamon you want to infuse the cream, a pinch is the smallest amount suggested) until boiling. Pour cream into the caramel and stir thoroughly. Be very careful as it may splatter and boil.
3. Pour the hot caramel-milk mixture over the milk and dark chocolate. Wait 30 seconds and stir until smooth.
4. Add the softened butter and whip hard and fast (if you have a plunging mixer use it). The chocolate should be smooth and shiny.

Dacquoise Biscuit (Almond Cake): Good, I made it on my silpat and it worked out ok. I also ground my own almonds and it worked out fine.

Ingredients
2.8 oz (3/4cup + 1Tbsp / 80g) almond meal
1.75 oz (1/2 cup / 50g) confectioner’s sugar
2Tbsp (15g) all-purpose flour
3.5oz (100g / ~100ml) about 3 medium egg whites
1.75 oz (4 Tbsp / 50g) granulated sugar

1. Finely mix the almond meal and the confectioner's sugar. (If you have a mixer, you can use it by pulsing the ingredients together for no longer than 30 seconds).
2. Sift the flour into the mix.
3. Beat the eggs whites, gradually adding the granulated sugar until stiff.
4. Pour the almond meal mixture into the egg whites and blend delicately with a spatula.
5. Grease a piece of parchment paper and line your baking pan with it.
6. Spread the batter on a piece of parchment paper to an area slightly larger than your desired shape (circle, long strip etc...) and to a height of 1/3 inches (8mm).
7. Bake at 350°F (180°C) for approximately 15 minutes (depends on your oven), until golden.
8. Let cool and cut to the desired shape.

Milk Chocolate Icing: Neither of us liked this layer at all. The gelatin made it look nice and shiny, but it had a weird rubbery texture.

Ingredients
4.2 oz (120g) milk chocolate
2 Tbsp (30g) butter
¼ cup (60g) heavy cream (35 % fat content)
1 2/3 Tbsp (30g) glucose or thick corn syrup

1. Soften the gelatin in cold water for 15 minutes.
2. Coarsely chop the chocolate and butter together.
3. Bring the cream and glucose syrup to a boil.
4. Add the gelatin.
5. Pour the mixture over the chocolate and butter. Whisk until smooth.
6. Let cool while checking the texture regularly. As soon as the mixture is smooth and coats a spoon well (it is starting to gelify), use immediately.

Saturday, November 29, 2008

November Daring Baker: Caramel Cake and Frosting

Wow! I'm going to make today's challenge date by the skin of my teeth. Because I put myself on a sugar treat block 3 weeks this month, I put off making this until I could eat sugar again. I think between Thanksgiving pies and this cake I am on sugar overload. Maybe I should go on sugar block again until Christmas...

Because I didn't want too much sugar after the holiday, I halved everything. I baked my cake in a 6 in. round cake pan. It worked perfectly. The frosting has a very unique flavor. I loved the browned butter flavor, but boy is it SWEET!!! I didn't even add all the sugar it called for. Matt said he thought it tasted like a fancy desert you'd get at a restaurant. You know, the kind you can only eat the small portion you're given before going into a sugar coma. He liked it.

I first started by making the caramel syrup. Two suggestions on the forums really helped me out here.
  1. After turning the heat on, don't stir the sugar until it turns amber and you add the water.
  2. When you add the water, use a strainer. I didn't have any splatters or splashes whatsoever come near my tender skin...
  3. Also, don't over cook the syrup. I let mine reduce a little too long and it turned out a little too firm. When I used it in the cake batter there were little crystal shards. It turned out just fine after baking, but I had to add a little water and reheat the syrup just long enough to thin it out so I could use it in the frosting.

I'm obviously no cake decorator!
After cutting out Matt's piece, I thought it quite resembled Pacman.


This month's challenge is hosted by Dolores, Alex, and Jenny.

RECIPE SOURCE

Caramel Cake with Caramelized Butter Frosting courtesy of Shuna Fish Lydon (http://eggbeater.typepad.com/), as published on Bay Area Bites (http://blogs.kqed.org/bayareabites/).

CARAMEL CAKE WITH CARAMELIZED BUTTER FROSTING

10 Tablespoons unsalted butter at room temperature
1 1/4 Cups granulated sugar
1/2 teaspoon kosher salt
1/3 Cup Caramel Syrup (see recipe below)
2 each eggs, at room temperature
splash vanilla extract
2 Cups all-purpose flour
1/2 teaspoon baking powder
1 cup milk, at room temperature


Preheat oven to 350F

Butter one tall (2 – 2.5 inch deep) 9-inch cake pan.

In the bowl of a stand mixer fitted with a paddle attachment, cream butter until smooth. Add sugar and salt & cream until light and fluffy.

Slowly pour room temperature caramel syrup into bowl. Scrape down bowl and increase speed. Add eggs/vanilla extract a little at a time, mixing well after each addition. Scrape down bowl again, beat mixture until light and uniform.

Sift flour and baking powder.

Turn mixer to lowest speed, and add one third of the dry ingredients. When incorporated, add half of the milk, a little at a time. Add another third of the dry ingredients, then the other half of the milk and finish with the dry ingredients. {This is called the dry, wet, dry, wet, dry method in cake making. It is often employed when there is a high proportion of liquid in the batter.}

Take off mixer and by hand, use a spatula to do a few last folds, making sure batter is uniform. Turn batter into prepared cake pan.

Place cake pan on cookie sheet or 1/2 sheet pan. Set first timer for 30 minutes, rotate pan and set timer for another 15-20 minutes. Your own oven will set the pace. Bake until sides pull away from the pan and skewer inserted in middle comes out clean. Cool cake completely before icing it.

Cake will keep for three days outside of the refrigerator.

CARAMEL SYRUP

2 cups sugar
1/2 cup water
1 cup water (for "stopping" the caramelization process)
In a small stainless steel saucepan, with tall sides, mix water and sugar until mixture feels like wet sand. Brush down any stray sugar crystals with wet pastry brush. Turn on heat to highest flame. Cook until smoking slightly: dark amber.

When color is achieved, very carefully pour in one cup of water. Caramel will jump and sputter about! It is very dangerous, so have long sleeves on and be prepared to step back.

Whisk over medium heat until it has reduced slightly and feels sticky between two fingers. {Obviously wait for it to cool on a spoon before touching it.}

Note: For safety reasons, have ready a bowl of ice water to plunge your hands into if any caramel should land on your skin.

CARAMELIZED BUTTER FROSTING

12 tablespoons unsalted butter
1 pound confectioner’s sugar, sifted
4-6 tablespoons heavy cream
2 teaspoons vanilla extract
2-4 tablespoons caramel syrup
Kosher or sea salt to taste

Cook butter until brown. Pour through a fine meshed sieve into a heatproof bowl, set aside to cool.

Pour cooled brown butter into mixer bowl.

In a stand mixer fitted with a paddle or whisk attachment, add confectioner's sugar a little at a time. When mixture looks too chunky to take any more, add a bit of cream and or caramel syrup. Repeat until mixture looks smooth and all confectioner's sugar has been incorporated. Add salt to taste.

Note: Caramelized butter frosting will keep in fridge for up to a month.
To smooth out from cold, microwave a bit, then mix with paddle attachment until smooth and light
-

Saturday, November 15, 2008

Cooking and Using Fresh Pumpkin

As Halloween is just over and Thanksgiving is coming up, pumpkin season is right on top of us. I had a couple sugar pumpkins I picked up early on (they go so fast!), but I used one for Dean's birthday cake and the other will be for a pumpkin pie. I wanted some pumpkin for the freezer and was happy to pick up a large after-Halloween-pumpkin on sale for $1 a couple weeks ago.

To cook a pumpkin: Preheat the oven to 350*

The small sugar pumpkins make around 2 cups of puree. The large pumpkin I used made 10 cups of puree.
  1. Cut off the top (like you would if you were carving it),
  2. Scoop out as much of the innards as possible.
  3. Cut into chunks. I cut the small sugar pumpkin in half. I cut the large pumpkin into 8ths.
  4. Place skin side up on a cookie sheet. I have done it both directly on the cookie sheet and also on a silpat. I think I liked the silpat better. Less browning.
  5. Cook sugar pumpkins about 30 min. or until tender when pierced with a fork. Cook large pumpkins about 1 hour.
  6. Take out of the oven and cool until you can handle it.
  7. Peel off the skin and remove any remaining strings and seeds you may have missed.
  8. Cut up into smaller chunks and blend in a food processor. I usually have to add a little bit of water or milk. Just enough to get it to move and puree properly.
  9. BLEND UNTIL IT'S VERY SMOOTH. Do not attempt to mash it with a potato masher. Chunks don't "cook out" in pies.
  10. Store it in the fridge if you're going to use it in the next couple of days. Store it in the freezer (I put it in 2 cup Tupperware bowls. That way you can use it a little at a time.) for longer term. To thaw just pop it in the fridge or let it sit on your counter a day or two in advance.
  11. (Use just like canned pumpkin. You don't have to add sugar to it since all recipes using pumpkin will have sugar in them.)

We wanted a "healthier" cake for Dean's first birthday since he's really not eaten refined sugar much. We were going to go with carrot cake, but my sugar pumpkins were calling out for me to bake them. We went with this pumpkin cake and I loved it. It was super moist. We topped it with this cream cheese frosting.

Dean's 1st Birthday Cake (Pumpkin
: Originally found on Allrecipes Modified by me.
2 C. Sugar
3/4 C. Oil
3/4 C. apple sauce
1 tsp. vanilla
2 C. pumpkin puree
4 eggs
2 C. all purpose flour
3 tsp. baking powder
2 tsp. baking soda
1/4 tsp salt
1 Tbsp. cinnamon
2 tsp. ginger
1 tsp. ground cloves

Bake at 350*. If using a 9X13 cook about 35 min. or until a toothpick comes clean. If using a fluted bunt pan, cook about 50-60 min. or until a toothpick comes clean.

Sunday, August 31, 2008

Chocolate Eclairs

This month I decided to join the ever growing circle of Daring Bakers. The challenge this month was Pierre Hermes' Chocolate Eclairs. It was for chocolate glazed and chocolate filled eclairs. We had to keep one of the chocolate elements, but had the liberty to choose which one and what other flavors (if any) we wanted to introduce.

This was my first time for doing pretty much every part of the challenge: the chocolate glaze, pastry cream, and pastry dough. Oh, and I've never been much of a food photographer, so I'm learning about that as well.

I had to split this up into 2 days because of cooking time constraints with a baby and all.

Day 1
I first started by

so I could make the chocolate sauce and glaze.


Now, I thought it a bit odd I'd have to make a chocolate sauce in order to make the glaze. It felt a little over the top. The glaze only needed 7 Tbsp. of sauce, so I cut the original sauce recipe in half. The sauce seemed to take FOR-EV-ER since you had to thicken it on low. I think I was sitting there stirring about 20 min. or so. The sauce really was essential to the glaze. The glaze was nice and pretty dark. Will I make it a again? No. Took too long for my baking attention span!

I also made the
the first day.
I made a vanilla pastry cream because Matt wanted it simple and not a chocolate overload.
I've been looking for the recipe I used, but I've misplaced it somewhere! I think it may have been a Julia Child recipe I found online though...

For my enjoyment, to a small portion, I added a little
I thought the orange would go nicely with the dark chocolate glaze.
It did.
(But the vanilla was better.)
Day 2
I began on the stove top by


I then took it off the heat and added eggs in 1 at a time.

Don't forget to pipe the dough while it's still warm!

(As an aside here, the recipe calls for the pastries to be baked on wax or parchment paper. I couldn't find my parchment paper, so I did a few on wax and most of them on the silpat. The wax paper started smoking and stinking up the house, so I quickly pulled the few off and baked them directly on the pan. They still worked out. The silpat worked very nicely, though.)

After 20 min. of baking, rotating, and propping the door with a wooden spoon,
Voila!

Now to combine all my efforts...I present to you The Eclair!
These were good. Matt's response after tasting them was, "Yep. This is an eclair." We were happy with how they turned out, especially since it was my first try. It was a whole lot of steps and effort, though. I probably won't be making them again any time soon.
But I'm very glad I made them for this challenge.

So, if you're feeling DARING, here is the recipe:

Pierre Hermé’s Chocolate Éclairs
Recipe from Chocolate Desserts by Pierre Hermé
(makes 20-24 Éclairs)

• Cream Puff Dough (see below for recipe), fresh and still warm

1) Preheat your oven to 375 degrees F (190 degrees C). Divide the oven into thirds by positioning the racks in the upper and lower half of the oven. Line two baking sheets with waxed or parchment paper.

2) Fill a large pastry bag fitted with a 2/3 (2cm) plain tip nozzle with the warm cream puff dough. Pipe the dough onto the baking sheets in long, 4 to 41/2 inches (about 11 cm) chubby fingers. Leave about 2 inches (5 cm) space in between each dough strip to allow them room to puff. The dough should give you enough to pipe 20-24 éclairs.

3) Slide both the baking sheets into the oven and bake for 7 minutes. After the 7 minutes, slip the handle of a wooden spoon into the door to keep in ajar. When the éclairs have been in the oven for a total of 12 minutes, rotate the sheets top to bottom and front to back. Continue baking for a further 8 minutes or until the éclairs are puffed, golden and firm. The total baking time should be approximately 20 minutes.

Notes:
1) The éclairs can be kept in a cool, dry place for several hours before filling.

Assembling the éclairs:

• Chocolate glaze (see below for recipe)
• Chocolate pastry cream (see below for recipe)

1) Slice the éclairs horizontally, using a serrated knife and a gently sawing motion. Set aside the
bottoms and place the tops on a rack over a piece of parchment paper.

2) The glaze should be barely warm to the touch (between 95 – 104 degrees F or 35 – 40 degrees C, as measured on an instant read thermometer). Spread the glaze over the tops of the éclairs using a metal icing spatula. Allow the tops to set and in the meantime fill the bottoms with the pastry cream.

3) Pipe or spoon the pastry cream into the bottoms of the éclairs. Make sure you fill the bottoms with enough cream to mound above the pastry. Place the glazed tops onto the pastry cream and wriggle gently to settle them.

Notes:
1) If you have chilled your chocolate glaze, reheat by placing it in a bowl over simmering water, stirring it gently with a wooden spoon. Do not stir too vigorously as you do not want to create bubbles.

2) The éclairs should be served as soon as they have been filled.

Pierre Hermé’s Cream Puff Dough
Recipe from Chocolate Desserts by Pierre Hermé
(makes 20-24 Éclairs)

• ½ cup (125g) whole milk
• ½ cup (125g) water
• 1 stick (4 ounces; 115g) unsalted butter, cut into 8 pieces
• ¼ teaspoon sugar
• ¼ teaspoon salt
• 1 cup (140g) all-purpose flour
• 5 large eggs, at room temperature

1) In a heavy bottomed medium saucepan, bring the milk, water, butter, sugar and salt to the
boil.

2) Once the mixture is at a rolling boil, add all of the flour at once, reduce the heat to medium and start to stir the mixture vigorously with a wooden spoon. The dough comes together very quickly. Do not worry if a slight crust forms at the bottom of the pan, it’s supposed to. You need to carry on stirring for a further 2-3 minutes to dry the dough. After this time the dough will be very soft and smooth.

3) Transfer the dough into a bowl of a mixer fitted with the paddle attachment, or using your
handmixer or if you still have the energy, continue by hand. Add the eggs one at a time, beating after each egg has been added to incorporate it into the dough. You will notice that after you have added the first egg, the dough will separate, once again do not worry. As you keep working the dough, it will come back all together again by the time you have added the third egg. In the end the dough should be thick and shiny and when lifted it should fall back into the bowl in a ribbon.

4) The dough should be still warm. It is now ready to be used for the éclairs as directed above.

Notes:
1) Once the dough is made you need to shape it immediately.

2) You can pipe the dough and the freeze it. Simply pipe the dough onto parchment-lined baking
sheets and slide the sheets into the freezer. Once the dough is completely frozen, transfer the
piped shapes into freezer bags. They can be kept in the freezer for up to a month.

Chocolate Pastry Cream
Recipe from Chocolate Desserts by PierreHermé

• 2 cups (500g) whole milk
• 4 large egg yolks
• 6 tbsp (75g) sugar
• 3 tablespoons cornstarch, sifted
• 7 oz (200g) bittersweet chocolate, preferably Velrhona Guanaja, melted
• 2½ tbsp (1¼ oz: 40g) unsalted butter, at room temperature

1) In a small saucepan, bring the milk to a boil. In the meantime, combine the yolks, sugar and cornstarch together and whisk in a heavy‐bottomed saucepan.

2) Once the milk has reached a boil, temper the yolks by whisking a couple spoonfuls of the hot milk into the yolk mixture.Continue whisking and slowly pour the rest of the milk into the tempered yolk mixture.

3) Strain the mixture back into the saucepan to remove any egg that may have scrambled. Place the pan over medium heat and whisk vigorously (without stop) until the mixture returns to a boil. Keep whisking vigorously for 1 to 2 more minutes (still over medium heat).Stir in the melted chocolate and then remove the pan from the heat.

4) Scrape the pastry cream into a small bowl and set it in an ice‐water bath to stop the cooking process. Make sure to continue stirring the mixture at this point so that it remains smooth.

5) Once the cream has reached a temperature of 140 F remove from the ice‐water bath and stir in the butter in three or four installments. Return the cream to the ice‐water bath to continue cooling, stirring occasionally, until it has completely cooled. The cream is now ready to use or store in the fridge.

Notes:
1) The pastry cream can be made 2‐3 days in advance and stored in the refrigerator.

2) In order to avoid a skin forming on the pastry cream, cover with plastic wrap pressed onto the cream.

3) Tempering the eggs raises the temperature of the eggs slowly so that they do not scramble.

Chocolate Glaze
Recipe from Chocolate Desserts by Pierre Hermé
(makes 1 cup or 300g)

• 1/3 cup (80g) heavy cream
• 3½ oz (100g) bittersweet chocolate, finely chopped
• 4 tsp (20 g) unsalted butter, cut into 4 pieces, at room temperature
• 7 tbsp (110 g) Chocolate Sauce (recipe below), warm or at room temperature

1)In a small saucepan, bring the heavy cream to a boil. Remove from the heat and slowly begin to add the chocolate, stirring with a wooden spoon or spatula.

2) Stirring gently, stir in the butter, piece by piece followed by the chocolate sauce.

Notes:
1) If the chocolate glaze is too cool (i.e. not liquid enough) you may heat it briefly
 in the microwave or over a double boiler. A double boiler is basically a bowl sitting over (not touching) simmering water.

2) It is best to glaze the eclairs after the glaze is made, but if you are pressed for time, you can make the glaze a couple days ahead of time, store it in the fridge and bring it up to the proper temperature (95 to 104 F) when ready to glaze.

Chocolate Sauce
Recipe from Chocolate Desserts by Pierre Hermé
(makes 1½ cups or 525 g)


• 4½ oz (130 g) bittersweet chocolate, finely chopped
• 1 cup (250 g) water
• ½ cup (125 g) crème fraîche, or heavy cream
• 1/3 cup (70 g) sugar

1) Place all the ingredients into a heavy‐bottomed saucepan and bring to a boil, making sure to stir constantly. Then reduce the heat to low and continue stirring with a wooden spoon until the sauce thickens.

2) It may take 10‐15 minutes for the sauce to thicken, but you will know when it is done when it coats the back of your spoon.

Notes:
1) You can make this sauce ahead of time and store it in the refrigerator for two weeks. Reheat the sauce in a microwave oven or a double boiler before using.
2) This sauce is also great for cakes, ice-cream and tarts.

Saturday, July 12, 2008

Cheesecake Pops

I recently found out about a cool blog-ring called The Daring Bakers' Challenge. Every month all participants get a challenge. They have to make the same recipe, take photos, and blog their end result on the same appointed day. This was the April challenge. I love challenges, so I decided to join the Darking Bakers and I will officially start with the challenges in August.

They are from Sticky, Chewy, Messy, Gooey by Jill O’Connor.

Cheesecake Pops
Makes 30 – 40 Pops

5 8-oz. packages cream cheese at room temperature
2 cups sugar
¼ cup all-purpose flour
¼ teaspoon salt
5 large eggs
2 egg yolks
2 teaspoons pure vanilla extract
¼ cup heavy cream
Boiling water as needed
Thirty to forty 8-inch lollipop sticks
1 pound chocolate, finely chopped – you can use all one kind or half and half of dark, milk, or white (Alternately, you can use 1 pound of flavored coatings, also known as summer coating, confectionary coating or wafer chocolate – candy supply stores carry colors, as well as the three kinds of chocolate.)
2 tablespoons vegetable shortening
(Note: White chocolate is harder to use this way, but not impossible)

Assorted decorations such as chopped nuts, colored jimmies, crushed peppermints, mini chocolate chips, sanding sugars, dragees) - Optional

Position oven rack in the middle of the oven and preheat to 325 degrees F.

In a large bowl, with an electric mixer set at low speed, beat together the cream cheese, sugar, flour, and salt until smooth. Add the whole eggs and the egg yolks, one at a time, beating well (but still at lwo speed) after each addition. Beat in the vanilla and cream.

Lightly grease a 10-inch cake pan (not a springform pan). Pour the cheesecake batter into the cake pan and place in a larger roasting pan. Fill the roasting pan with boiling water until it reaches halfway up the sides of the cake pan. Bake until the cheesecake is firm and slightly goldenon top, 35 to 45 minutes.

Remove the cheesecake from the water bath and cool to room temperature. Cover the cheesecake with plastic wrap and refrigerate until very cold, at least 3 hours or up to overnight.

When cold and very firm, scoop the cheesecake into 2-ounce balls and place on a parchemtn paper-lined baking sheet. Carefully insert a lollipop stick into each cheesecake ball. Freeze the pops, uncovered, until very hard, at least 1 – 2 hours.

When the cheesecake pops are frozen and ready for dipping, prepare the chocolate. In the top of a double boiler, set over simmering water, or in a heatproof bowl set over a pot of simmering water, heat half the chocolate and half the shortening, stirring often, until chocolate is melted and chocolate and shortening are combined. Stir until completely smooth. Save the rest of the chocolate and shortening for later dipping, or use another type of chocolate for variety.

Alternately, you can microwave the same amount of chocolate coating pieces on high at 30 second intervals, stirring until smooth.

Quickly dip a frozen cheesecake pop in the melted chocolate, swirling quickly to coat it completely. Shake off any excess into the melted chocolate. If you like, you can now roll the pops quickly in optional decorations. You can also drizzle them with a contrasting color of melted chocolate (dark chocolate drizzled over milk chocolate or white chocolate over dark chocolate, etc.) Place the pop on a clean parchment paper-lined baking sheet to set. Repeat with remaining pops, melting more chocolate and shortening (or confectionary chocolate pieces) as needed.

Refrigerate the pops for up to 24 hours, until ready to serve.

---------------------------------------------------------------------------------------
My review of the cheesecake:
Most of the reviews said that this cheesecake didn't set at the time and temp. given in this recipe. So I wne to my normal recipe and took the time and temp from there. That was kind of a mistake because I ended up overcooking it a little.

Overall the taste was good, but this recipe called for a lot of eggs and I could actually taste the egg on the slightly overcooked edges. I didn't have a large enough pan to do a proper water bath and my cake ended up rising, splitting, and then collapsing a little bit. I think this was because of the eggs and perhaps over mixing combined with no water bath. I make cheesecake every valentine's day and I've never had problems like this. I think I will actually stay with my normal recipe from now on. Once I trimmed the top, bottom, and sides off, I was ready to scoop.

The ball rolling was a little messy, but I didn't have huge problems with it. I just had to periodically wash my hands to get the stickiness off. The sticks were easy enough, and dipping was fairly easy. However, because the cheesecake was frozen, it made the dipping chocolate firm up rather quickly, so I had to decorate fast. I just let them sit head up in a cup to firm before putting them back in the fridge.

Oh, I dipped a few in jam before I dipped in the chocolate. It made the chocolate a little tricky, but the pops with the thinner homemade strawberry jam turned out quite tasty. The ones with the thicker freezer jam were too sweet.

Main problem:
The main problem with this recipe was the stick. This is a rather cute idea, but the cheesecake just didn't adhere well enough to the stick to actually eat it like a lollipop. If I set them upside down the stick just pulled out when the cheesecake was at room temp. If I turned them right side up, the cheesecake slid right down the stick. So, overall, these were a little tricky to serve.